How to Lighten a Layer in Clip Studio Art
New Correction Layer [PRO/EX]
Creates a new tonal correction layer to a higher place the selected layer. Correction layers have the following features.
·Correction layers can suit the brightness, hue, saturation, luminosity, and posterization levels of lower layers.
·Created correction layers apply an effect to all lower layers. For details, see "Creating a tonal correction layer ".
·You can modify the layer order to modify the layers afflicted by the tonal correction layer. The strength of the effect can be adjusted by editing the layer mask. For details, encounter "Irresolute the surface area of a tonal correction layer ".
·Double-click a tonal correction layer to edit the settings. For details, see "Editing a tonal correction layer ".
| To direct apply tonal correction to a selected layer, apply the [Edit] menu > [Tonal correction] and choose the advisable command. For details, please refer to "Tonal correction ". |
Types of correction layer
You can create the following types of correction layers.
| Brightness/Contrast | Adjusts the brightness and contrast of an image. |
| Hue/Saturation/Luminosity | Adjusts the three components (hue, saturation and luminosity) of the HSV color model. |
| Posterization | Converts an image into the specified slope. |
| Reverse Gradient | Inverts the colors in an paradigm. |
| Level Correction | Adjusts the contrast of an epitome using the histogram. |
| Tone Curve | Adjusts the contrast of an prototype using the tone curve. |
| Color residue | Adjusts the tone of an image by adjusting the residue of each RGB color. |
| Binarization | Converts an prototype into a black and white duotone image. |
| Gradient map | Each shade in the paradigm is replaced with colors of the selected slope. |
Creating a tonal correction layer
This section describes how to employ tonal corrections, using the example of Gradient map layer.
1 In the [Layer] palette, select the layer yous want to utilise the upshot to.
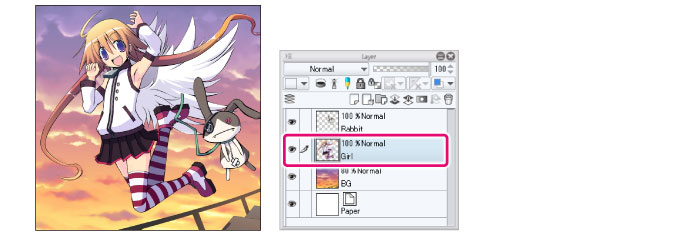
| ·If yous create a selection surface area, the effect will only be applied to the selection area. Yous can alter the size of the effect after. For details, please refer to "Changing the area of a tonal correction layer ". ·The effect applies to layers below the created correction layer. |
2 Select [Layer] menu > [New Correction Layer] > [Slope map].
3 Adjust the settings in the dialog box that appears.
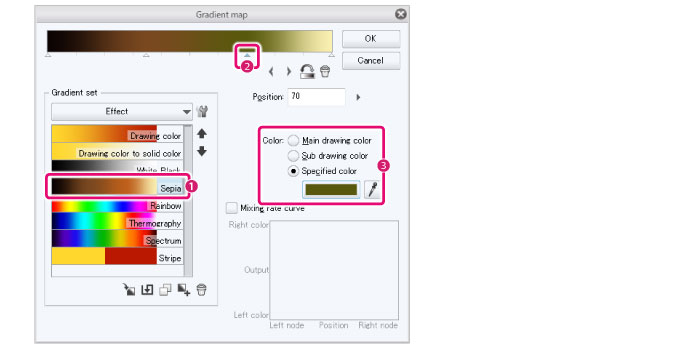
(one)Cull a gradient prepare from the list and double-click to select it.
(ii)Click a node below the colour bar.
(three)In the [Colour] section, select the color to use. The selected node volition alter to this color.

(4)You can drag nodes left and right to adjust levels of the gradient.
(5)Echo steps 2 to iv as necessary.
(6)Click [OK].
| ·If you select [Opposite Gradient], the dialog box will not announced. Proceed to the next step. ·As you edit the settings in the dialog box, a preview of the results volition be shown on the canvas. Y'all can check the results as yous edit the settings. |
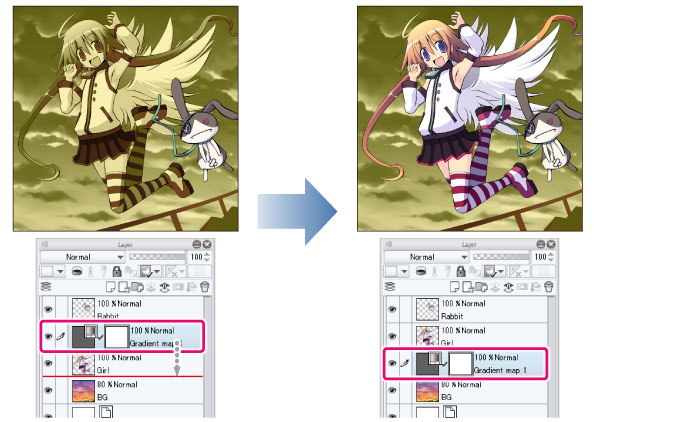
4 Later you select [OK], the tonal correction volition be applied and a tonal correction layer with a layer mask volition announced above the selected layer in the [Layer] palette.

| After creating the layer, yous can open the dialog box again to edit the settings. For details, please refer to "Editing a tonal correction layer ". |
Changing the area of a tonal correction layer
Adjusting the layer mask
You can select the layer mask and draw on it or erase parts of information technology to adapt the residuum over the original image.
·Erasing parts of the layer mask will reveal the original image.
·Drawing on the layer mask with a cartoon tool volition make the tonal correction result appear stronger.
| For data on how to adjust layer masks, run into "Layer Mask ". |
Changing the position of a tonal correction layer
Moving the correction layer in the [Layer] palette allows you to modify the layer to which the correction applies.
Applying a tonal correction layer to specific layers
If you create a tonal correction layer inside a layer binder, the result volition simply utilize to layers in the aforementioned layer folder.

| If you desire to apply the tonal correction effect to layers below the layer folder, set the blending mode of the binder to [Through]. |
Temporarily hiding a tonal correction layer
You tin temporarily hide the correction layer in the [Layer] palette to compare the state before and after applying the upshot.
| Deleting the correction layer will return the lower layers to the original country. |
Editing a tonal correction layer
Click the Tonal Correction layer icon on the [Layer] palette.
In the dialog box that appears, you can edit the settings for the tonal correction layer.

| Y'all cannot edit the settings for a [Reverse Gradient] tonal correction layer. |
Source: https://www.clip-studio.com/site/gd_en/csp/userguide/csp_userguide/500_menu/500_menu_layer_shikichou.htm
Postar um comentário for "How to Lighten a Layer in Clip Studio Art"